
So you want to make a VR game. Well, we can’t have a game without a user. This tutorial will show you how to recognize user interaction in Unity using C#.
Tweet
We’re about to build a simple game where we will connect objects with code that allows our game to recognize when our user is interacting with our game.
To follow along with this tutorial, you’re going to need a Unity project open that has at least one object that we can write scripts for. If you need help setting up your Unity project, go to our previous post How to Build a Unity Virtual Reality Game.
We’re using Unity v5.4.3f1. If you’re using a different version of Unity and find an incompatibility, drop us a comment down below with your question. Also, we know this tutorial is long, so feel free to use the comments to bookmark your spot!
In this tutorial:
Step 1: Making a Player Script
Step 2: Declaring Our First Variable
Step 3: Building Our First If Block
Step 4: Triggering the Headset Button
Step 5: Recognizing When We Hit an Object
Conclusion
Step 1: Making a Player Script
To get started, we will make our first script in the Assets folder. The bottom window in Unity contains the Project window. This window contains the Assets folder, which contains all the files that make up your game. Any 3D models, scripts, materials, animations, sound clips and video files will be in Assets.
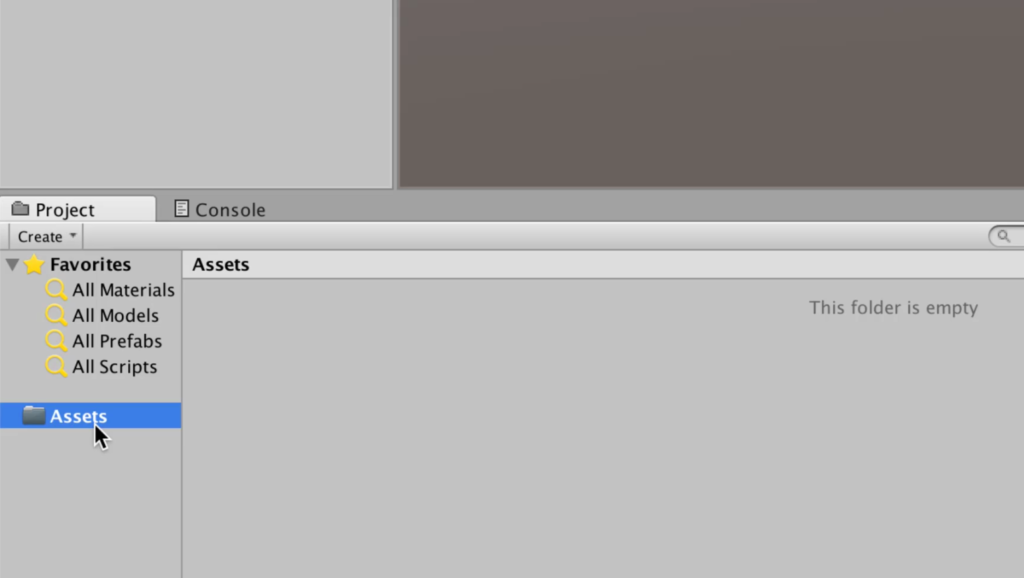
In this folder, create a C# script named “Player.” Drag and drop the Player script to your Player object. Double-click the Player script to open it.
Understanding Methods
When you open your script, you’ll see default code created by Unity containing two methods: Start() and Update().
A method can perform an operation and return the result. For instance, a method can add numbers, return the sum, and store the sum in a variable.
The Start() Method
The Start method is executed when the game is run. You’ll see the word “void” in the code, which means the Start method does not return anything. Anytime you see the word “void,” it means the function doesn’t return a value. Don’t worry, the method can still execute operations, and void methods are still useful and often used.
In between the parentheses of a method, you can pass any parameters of that method. Parameters make a method more specific. For instance, a method that changes the TV channel could have the number of the new channel as a parameter.
The method’s definition goes between the curly braces {}. The code within the braces will be executed when the Start method is called.
The Update() Method
The other default method provided by Unity is Update(). When a game or app runs, the smartphone or computer on which it is running updates the app constantly: processing, performing calculations, drawing pixels, sending messages, and more.
The Update method executes every time a game is updated. So for example, an app running at 60 frames per second will call the Update method 60 times each second.
Step 2: Declaring Our First Variable
Variables: the building blocks of code. When building a game in Unity, you often need to store information, such as a player’s age or the current time. Variables are perfect for storing data.
The plan for this implementation is that we will perform a raycast, which is like shooting a laser in a certain direction. When a player looks at an object, we want to shoot a ray from the player and print what they are looking at.
To start implementing, use the following code to declare a variable in your script, in the Update() method. The variable is named “hit” and is of type RaycastHit . The “type” of variable means that the value that is stored in hit will be of type RaycastHit.
// Update is called once per frame void Update () { RaycastHit hit; }
Next we’ll need an if block to run code when a raycast is performed.
Understanding If Blocks

Suppose we wanted to run code only when a certain condition is met. For instance, a player could only fly in a game if they had a jet pack. A player could only buy a bicycle if they had enough money. To implement this kind of functionality, we can use if blocks. An if block runs code when a specified condition passes.
Step 3: Building Our First If Block
Below your variable, use the following format to declare an if block.
// Update is called once per frame void Update () { RaycastHit hit;
if (Physics.Raycast()) {
}
}
Let’s unpack this if block. The code in between an if block’s parentheses () will contain the condition that needs to be met. If the condition passes, the code in the scope definition (between the curly braces) will execute.
So far, we have only half-made a condition. We have programmed that the if block should run code if the Raycast() method in the game’s Physics…nothing. We need to implement parameters that specify our condition!
Using the Raycast Method
Because the Raycast method belongs to Unity’s Physics class, Raycast() has pre-defined parameters that we need to declare.
- The first parameter of the Raycast method is the origin of the raycast, which is the position of the player. transform.position is the position of Player.
- The second parameter is the direction of the raycast.
- The third parameter will be the place that hit object is stored.
Use the following code to implement these three parameters into the if block’s conditions.
// Update is called once per frame void Update () { RaycastHit hit;
if (Physics.Raycast(transform.position, transform.forward, out hit)) {
} }
Let’s explain the parameters we’ve chosen:
- transform.forward is an arrow that will always point forward.
- transform.position is a collection of 3 values because it is a point. transform.forward is a direction. Both are Vector3’s.
- out hit means the hit object will be stored in the hit variable.
Using Raycasting, we’ve set up our if block’s conditions! What we have is: The if block will run its code IF the player looks at the object. The phrase used to describe an if block running its code is “the if block returns true,” meaning “the if block’s parameters return true.”
Executing an If Block
Now we have to set up what happens when the if block returns true, i.e. when the player hits a mole. If the condition passes, use the following code to print the name of the game object hit.
// Update is called once per frame void Update () { RaycastHit hit;
if (Physics.Raycast(transform.position, transform.forward, out hit)) {
Debug.Log(hit.transform.name); } }
What’s this mumbo jumbo? Let’s explain.
The Debug Log
To call a method, you call its class, use the dot operator, type the method name, and pass the parameters in parentheses. Debug is a class that is defined in the Unity engine. The . operator accesses a method inside the Debug class. Log calls the Log method.
Log is a Unity method you can use to print messages to the console. You can find it right beside the Project Window (which holds the Assets folder.) The console is a tool for developers like you to print messages. It’s useful for debugging (hence the name of the Debug class.)
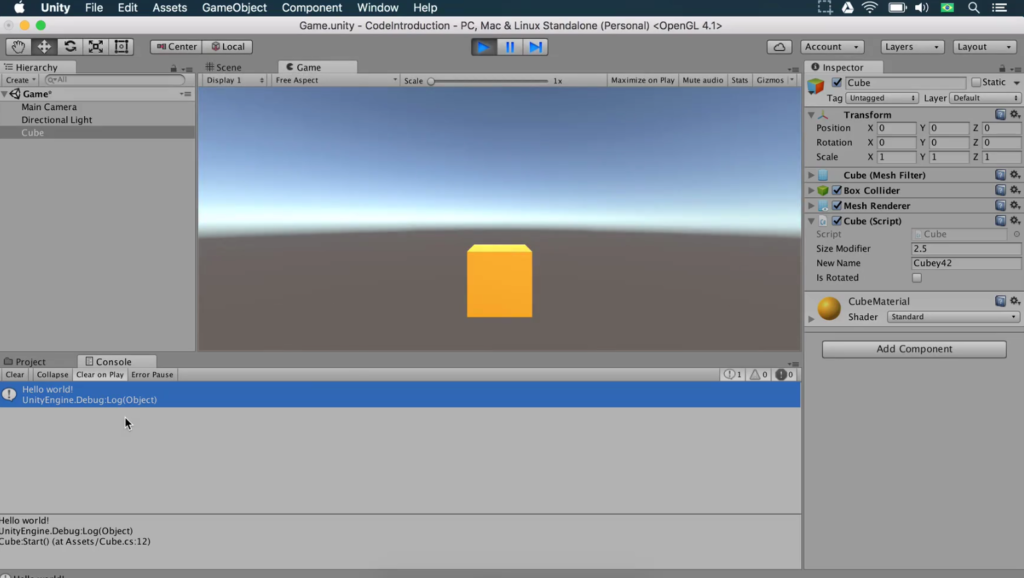
In the parameters of the Log method, you have to specify what you would like to be printed in the console. What we have is that the Log method should access the hit variable, get its Transform component (found in the Inspector Window of any object,) and get the Name property in that Transform component.
Using the Console
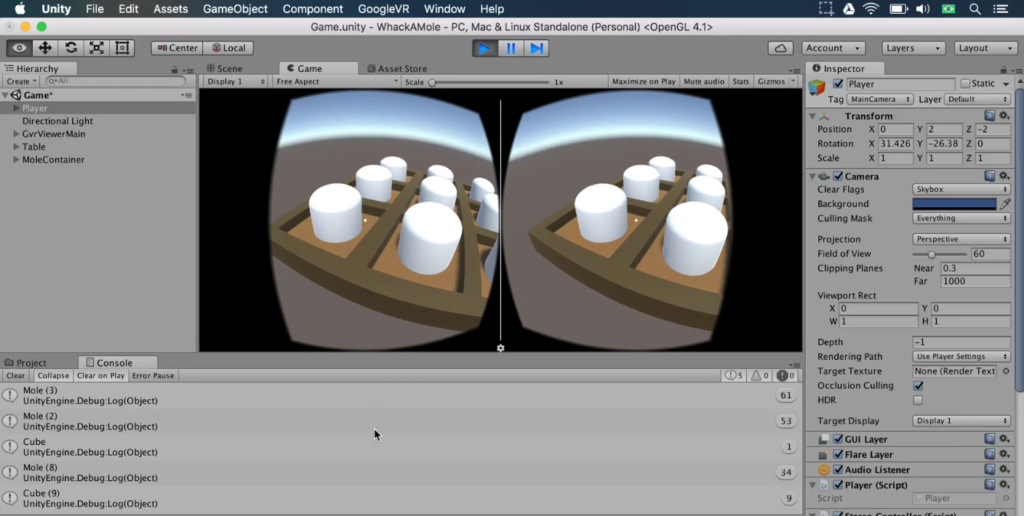
Don’t believe me? You shouldn’t. Test it out yourself! To do so, save the script, and open Unity. Press Play. Look around the scene. Each time the crosshair touches a game object, the name of the object will print in the console.
Stop playing the scene. We have more to work on! We only want the looking logic to execute when the player presses the Google Cardboard button or hits the Space key to simulate hitting the moles with a hammer.
Step 4: Triggering the Headset Button
To specify the looking logic, let’s open Player.cs. Enclose the Raycasting logic in the Update method with the following if block. This will run code when the Google Cardboard or other VR headset’s button is pressed by the player. In other words, the code will check the GvrViewer class and run when an Instance has been triggered.
// Update is called once per frame void Update () { if (GvrViewer.Instance.Triggered) { RaycastHit hit;
if (Physics.Raycast(transform.position, transform.forward, out hit)) {
Debug.Log(hit.transform.name); } }}
Don’t forget to close that new if block’s curly bracket! Where one curly bracket opens, another must close. Forgetting this can lead to errors…. We mean it.

Since we’re not using a headset to test but instead the computer, we can also include a condition that lets us print a Debug line with the press of a Space key. Use the following code to add an OR operator to the condition.
Allowing Multiple Possible Conditions
The OR operator is called with ||, and it tells an if block to run code if one condition is met OR another condition is met.
// Update is called once per frame void Update () { if (GvrViewer.Instance.Triggered || Input.GetKeyDown("space")) { RaycastHit hit;
if (Physics.Raycast(transform.position, transform.forward, out hit)) {
Debug.Log(hit.transform.name); } }}
Let’s explain the second condition we’ve allowed. This code will get the Input class’s GetKeyDown method. This method listens for a key that is held down. In this case, we’ve used the “space” keyword to listen for the Space key.
Test out the code! You can save lots of debugging time and headaches by testing often.
To do so, save the script, and open Unity. Press Play. When you look at an object and hit Space, the console will print the name of the object. Or at least, it should. If you’re not seeing that, check your code against ours. They should match! If the code still isn’t working, drop us a line in the comments below.
Step 5: Recognizing When We Hit an Object
Instead of printing the names of objects, we want to know when we hit a mole. To achieve this, we will make a Mole class. Stop playing the scene. Create a C# script named “Mole” in Assets. Connect the Mole script to the Mole object.
Press Apply to connect the script to all the other moles in the scene. Open Player.cs. We want to see if the game object hit contains a Mole component because if it does, the Player has looked at a mole.
Replace the Log method called with the following if block, which will run code when the object contained in hit contains a Mole component.
// Update is called once per frame void Update () { if (GvrViewer.Instance.Triggered || Input.GetKeyDown("space")) { RaycastHit hit;
if (Physics.Raycast(transform.position, transform.forward, out hit)) {
if (hit.transform.GetComponent<Mole> () != null) {
}
} }}
Let’s break down this code:
- This new if block’s condition will go to the hit variable, to its Transform Component, and will check that the object hit has a Mole component. It does this by using the NOT EQUAL TO operator.
- != means NOT EQUAL TO.
- null means “no value.”
- To summarize: The condition is checking that the hit variable has a value for the Mole component, effectively checking if the object hit is a mole.
If the condition passes, print “Hit a mole!” in the console using the same Log method as before:
// Update is called once per frame void Update () { if (GvrViewer.Instance.Triggered || Input.GetKeyDown("space")) { RaycastHit hit;
if (Physics.Raycast(transform.position, transform.forward, out hit)) {
if (hit.transform.GetComponent<Mole> () != null) { Debug.Log ("Hit a mole!"); }
} }}
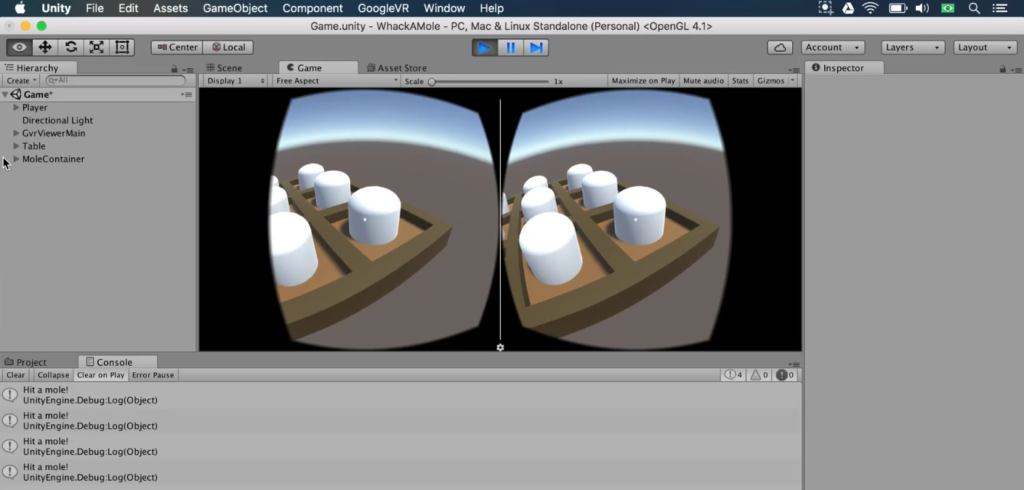
Let’s test out our code! Save the script, and open Unity. Press Play. Every time you look at a mole, the console will print “Hit a mole!”
Conclusion
That does it for this article! Let’s summarize what we’ve done so far:
- Understood methods, including the two default Unity methods in every script
- Built if blocks for conditoinal code
- Used the Debug log to test code and print statements
- Triggered the headset button
- Used raycasts to recognize when a player touches an object
- Built multiple possible conditions
We’ll continue this game in the next tutorial! Unless you oppose…. What tutorials do you want to see next? Drop a comment below.
Review
Step 1: Making a Player Script
Step 2: Declaring Our First Variable
Step 3: Building Our First If Block
Step 4: Triggering the Headset Button
Step 5: Recognizing When We Hit an Object
Conclusion
—Team Mammoth from Mammoth Interactive INC. Tutorial by Glauco Pires and Transcribing by Alexandra Kropova