Every game needs something to fight against. What else would keep players motivated? Learn how to make enemies in this free tutorial for Unity virtual reality game development!
Tweet
In this tutorial:
Setup
To follow along, you’re going to need a Unity virtual reality project open with a player and a room. If you need help setting up such a Unity project, go to our post Building a Castle in a Unity VR Game.
We’re using Unity v5.4.3f1. If you’re using a different version of Unity and find an incompatibility, drop us a comment down below with your question.
Step 1: Making Enemies, Not Friends
Open your Unity project, and we will start making our game enemies!
In the Layout menu in the top right, select “Default.” In the Hierarchy, right-click on your room object, which in our case is a castle named “Castle.”
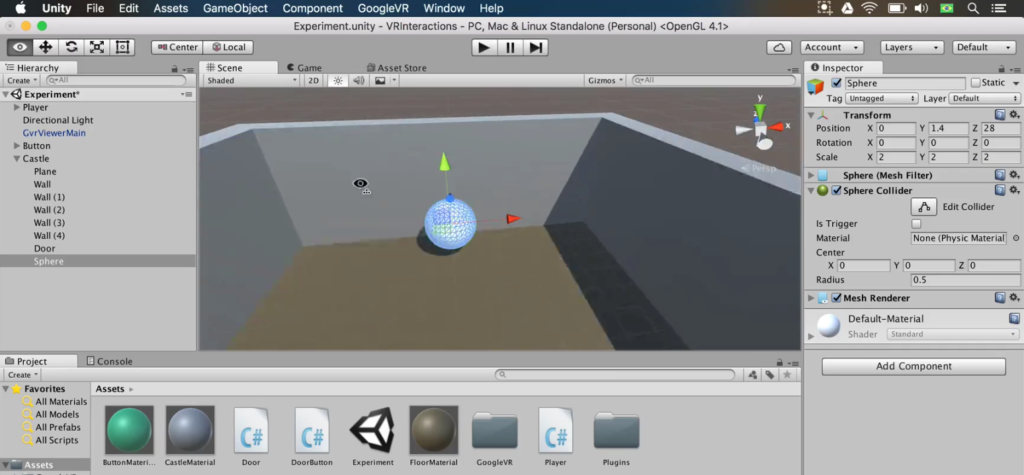
Then create a sphere. This will represent our enemy object. Set the Sphere’s position to 0 1.4 28. Change its Scale to 2 2 2.

Step 2: Adding Color
Let’s add some color to these enemies! Red is commonly associated with danger, so let’s add a red material to the Sphere.
Create a material in Assets. Name the material “EnemyMaterial”. Give EnemyMaterial a red color with RGB values 255 0 0. Drag and drop EnemyMaterial on top of Sphere. Rename Sphere “Enemy”.
Create a C# script in Assets. Name the script “Enemy”. Attach the Enemy script to the Enemy game object.
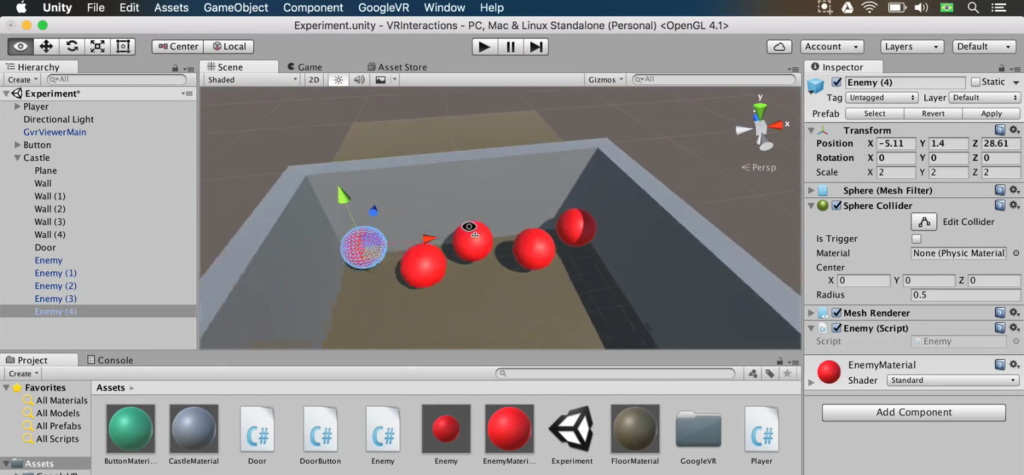
To enable us to change and spawn enemies later, let’s change the Enemy game object to a prefab. Drag and drop Enemy from the Hierarchy to Assets. Copy and paste the Enemy object five times, and move each sphere to a different position in the castle. Your Scene should appear as so:

Step 3: Programming the Enemies
The player’s objective will be to destroy the enemies. Now we can write the logic that enables the player to destroy these enemies and collect points.
Open your Player script, Player.cs. In the Update method, we need to include code to update the game when the player is shooting at enemies. The player will shoot enemies by pressing the VR headset trigger, such as the Google Cardboard button.
In Update(), type the following if block, whose condition will return true in the exact frame where the player presses the Cardboard button. To shoot again, the player must release the button and press it again.
//Shooting at enemies if (GvrViewer.Instance.Triggered) { }
Use the following format to add an OR operator and a second condition. The second condition will allow the player to press the Space key to shoot, as an alternative to the Cardboard button.
//Shooting at enemies if (GvrViewer.Instance.Triggered || Input.GetKeyDown ("space") { }
If the condition passes, include the next bold line to cast a ray of light at the enemy. This creates a RaycastHit variable named enemyHit.
//Shooting at enemies if (GvrViewer.Instance.Triggered || Input.GetKeyDown ("space") { RaycastHit enemyHit; }
Add a nested if block to run code when a raycast is performed. This code calls the Physics component of Player and shoots a Raycast from the player’s position (transform.position). The direction of the raycast is forward (transform.forward.) The raycast will end (out) when it collides with an enemyHit object (the enemy.)
//Shooting at enemies if (GvrViewer.Instance.Triggered || Input.GetKeyDown ("space") { RaycastHit enemyHit;
if (Physics.Raycast(transform.position, transform.forward, out enemyHit)) {} }
Include another nested if block to run code if the raycast hits an enemy.
//Shooting at enemies if (GvrViewer.Instance.Triggered || Input.GetKeyDown ("space") { RaycastHit enemyHit;
if (Physics.Raycast(transform.position, transform.forward, out enemyHit)) {
if (hit.transform.GetComponent<Enemy>() != null) { } } }
When an enemy is hit with a raycast, call the Destroy() method on the game object stored in the hit variable. This will destroy the enemy!
//Shooting at enemies if (GvrViewer.Instance.Triggered || Input.GetKeyDown ("space") { RaycastHit enemyHit;
if (Physics.Raycast(transform.position, transform.forward, out enemyHit)) {
if (hit.transform.GetComponent<Enemy>() != null) { Destroy(hit.transform.gameObject); } } }
Save the script, and open Unity. You can take the time that the compilation is taking to complete to save the scene. Note that it is good practice to save your scene often in case Unity crashes.
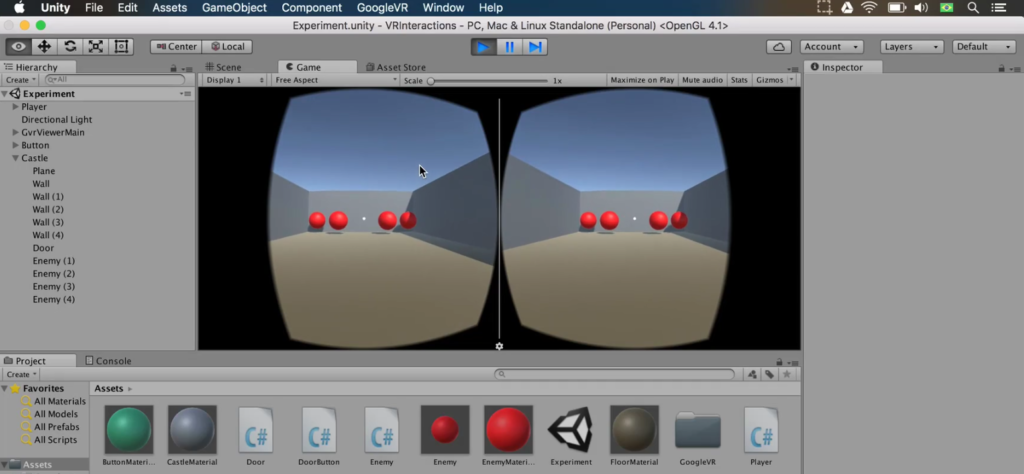
Press Play. Look at the button to open the door and enter the castle. Look at an enemy and press the Space key. The enemy will disappear.
Perfect! That means our player is destroying the enemy. We did it.

What tutorials do you want to see next? Drop a comment below.
Review
—Team Mammoth from Mammoth Interactive INC. Tutorial by Glauco Pires and Transcribing by Alexandra Kropova
