“Consciousness is only possible through change; change is only possible through movement.” ― Aldous Huxley, The Art of Seeing
Movement is crucial for games. Let’s learn how to make game objects that move in this free tutorial by @MammothCompany!
Tweet
In this tutorial:
- Part 1: Make an Object That Will Move
- Part 2: Understanding Object Components
- Part 3: Set the Object’s Position
- Part 4: Make an Object Move
- Part 5: Making the Speed Cross-Platform
- Part 6: Rotating the Player
Setup
To follow along with this tutorial, you’ll need to open a new Unity project.
Part 1: Make an Object That Will Move
In this free tutorial, we will make a cube that rotates. Let’s jump in and get started right away!
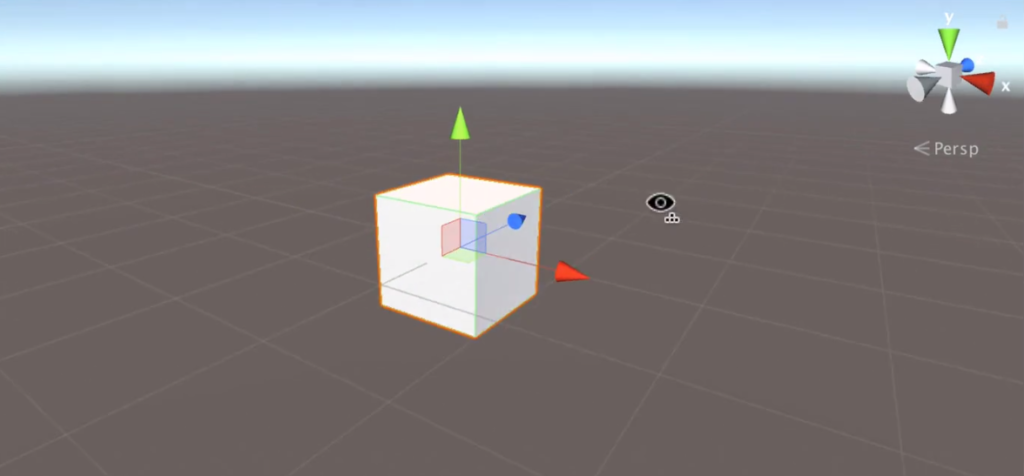
Open your Unity project. Right-click in the Hierarchy, and choose 3D Object > Cube. A cube will appear in the Viewport
Part 2: Understanding Object Components
The Cube’s components will appear in the Inspector. The component Cube (Mesh Filter) contains the data for the 3D element we are using. The Box Collider component is used to process collisions, which we will do later.
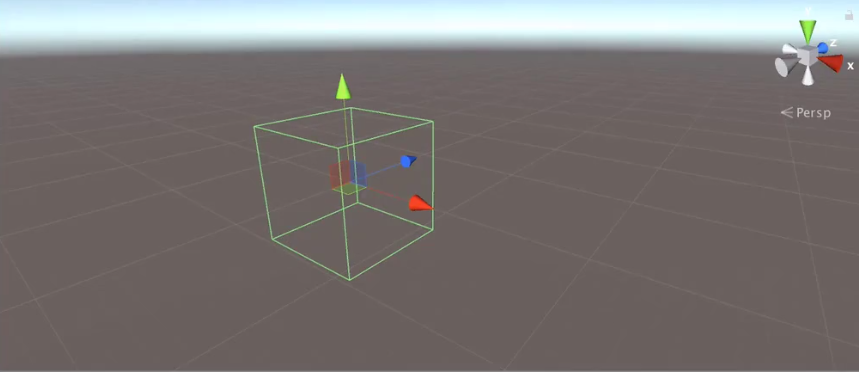
Mesh Renderer draws Cube in the game. If you unselect Mesh Renderer, only the outline of the Cube, its Box Collider, will appear in the Viewport.
Part 3: Set the Object’s Position
To make the Cube rotate, we must first set its position. Select Cube in the Hierarchy. In the Inspector, rename Cube “Player”. The cube will be our game’s player.
We need to make a script for the player. Right-click in the Scripts folder. Select Create > C# Script. Name the script “Player”.
Once the compilation finishes, select the Player game object. Drag and drop the Player script to a blank space in the Inspector.
Double-click on the Player script to open it. We can use the script to change the Player object’s position. Type the following code in the Start method.
void Start () { transform.position = new Vector3 (0, 4, 0);
}
How to Use the Position Property
What does this code mean? The keyword transform allows us to access the Transform component in the Player game object. The dot means we will access something inside the Transform component.
The position keyword allows you to access the Position property. If you hover your mouse over position, you will see the code public Vector3 position { get; set; }. This code means that we can either read or change the position of Player. In our case, we want to change Player’s position. That is why we used an equals sign to make an assignment.
The keywords new Vector3 creates a vector with x, y, and z values. The values are specified in parentheses. As you can see, we set Player’s X Position to 0, Y Position to 4, and Z Position to 0.
Testing the New Player Position
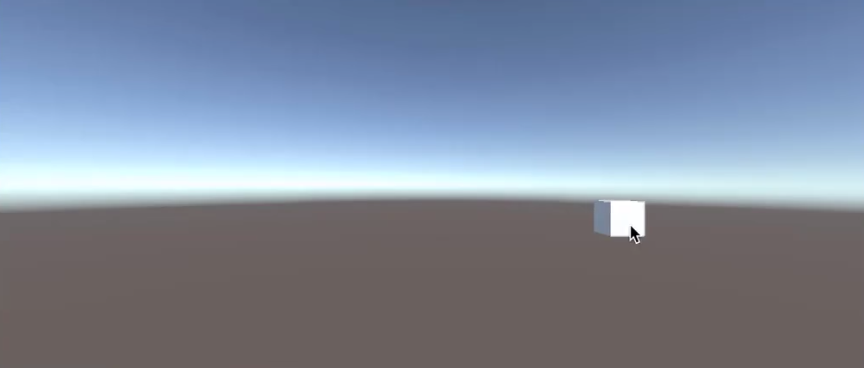
Let’s test this line! Save the script, and open Unity. Press Play. The cube’s Y Position will have changed from 0 to 4.

Awesome! We have the player’s position set, and it changed because of our script. Press Stop. Next, we’ll implement movement into the player’s position.
Part 4: Make an Object Move
To make the player move when the game begins, we can apply different logic. Cut and paste the transform line from the Start method into the Update method.
void Update () { transform.position = new Vector3 (0, 4, 0);
}
Changing Position Values
What if we wanted to make Player move 0.1 units to the right every time the Update method is called? To do this, replace the X Position value in the transform line transform.position.x + 0.1f. This line retrieves Player’s X Position and increases it by 0.1.
void Update () { transform.position = new Vector3 (transform.position.x + 0.1f, 4, 0);
}

Using Floats for Position
The f after 0.1 stands for float, or floating-point number. A float is another type of variable. Floats are used to store numbers that contain decimal places, such as 3.14. Integers, on the other hand, can only store whole numbers, such as 3.
Let’s test this changed line. Save the script, and open Unity. Press Play. The cube will begin moving to the right from the position 0 0 0.
Press Stop. Next, we need to handle the speed to make sure it is the same across different devices.
Part 5: Making the Speed Cross-Platform
Player moved at a certain speed. However, Player’s speed on your computer could be different from Player’s speed on my computer depending on your computer’s processing speed.
If one computer has a fast processing speed, it will call the Update method at a faster frame rate per second than a computer with a slower processing speed. Subsequently, Player would move faster on the faster computer’s screen.
We can use code to make Player move at the same speed regardless of the device. Open Player.cs. At the top of the class, first make a variable to contain Player’s speed.
public float movementSpeed = 0.1f;
In the Update method, you can replace 0.1f with movementSpeed.
void Update () { transform.position = new Vector3 (transform.position.x + movementSpeed, 4, 0);
}
Using Time.deltaTime
Now to make the speed the same across devices, multiply movementSpeed by Time.deltaTime.
void Update () { transform.position = new Vector3 (transform.position.x + movementSpeed * Time.deltaTime, 4, 0);
}
Time.deltaTime returns the amount of time that has passed since the last frame. If you’re running the game on a fast computer, Time.deltaTime will be a small number. If you’re running the game on a slow computer, Time.deltaTime will be a large number.
Thus Time.deltaTime makes the value of movementSpeed the same across devices. This is important to make your game be equally difficult across devices.
Testing Player Movement
Let’s test this code. Save the script, and open Unity. Press Play. Player’s speed may now be different. You can change Player’s speed by changing the value of Movement Speed in the Player (Script) component in the Inspector.
However, note that if you change the value as the game is running, the value will not be saved when you press Stop. To permanently set Player’s speed to 3 for example, stop playing the game and then change Movement Speed to 3 in the Inspector.
Part 6: Rotating the Player
What if we want to rotate Player as the game runs? Open Player.cs. At the top of the Player class, create another float named rotationSpeed. Give it the value 3f.
public float rotationSpeed = 3f;
In the Update method, call the RotateAround method in the Transform component. This method has 3 parameters:
- The first parameter is the point of origin around which the game object will rotate. To have Player rotate around its center at any given time, type transform.position.
- The second parameter is the axis around which Player will rotate. Set this to Vector3.up. Vector3.up is a vector (direction) that points up.
- The third parameter is the angle of rotation. Set this to rotationSpeed * Time.deltaTime. Your code should look like the following.
void Update () { transform.position = new Vector3 (transform.position.x + movementSpeed * Time.deltaTime, 4, 0);
transform.RotateAround (transform.position, Vector3.up, rotationSpeed * Time.deltaTime);}
Save the script, and open Unity. Press Play. You may need to change the value of Rotation Speed in the Inspector to see Player rotate. At the same time, Player will move to the right.
Press Stop. You can adjust the values of Movement Speed and Rotation Speed as you see fit, such as to 1 and 200, respectively.
Review
- Part 1: Make an Object That Will Move
- Part 2: Understanding Object Components
- Part 3: Set the Object’s Position
- Part 4: Make an Object Move
- Part 5: Making the Speed Cross-Platform
- Part 6: Rotating the Player
—Team Mammoth from Mammoth Interactive INC. Tutorial by Glauco Pires and Transcribing by Alexandra Kropova