Do you want to build 2D and 3D games? Unity is one of the most popular engines used for game development. Learn how to navigate the Unity editor in this free game development tutorial!
Tweet
We’re using Unity v5.4.3f1. If you’re using a different version of Unity and find an incompatibility, drop us a comment down below with your question.
In this tutorial:
Part 1: Introduction to the Unity Editor
Part 2: What are the Windows of the Unity Editor?
Step 3: Changing a Game Scene
Part 1: Introduction to the Unity Editor
Have you installed Unity? If so, let’s jump right in and start using the editor.
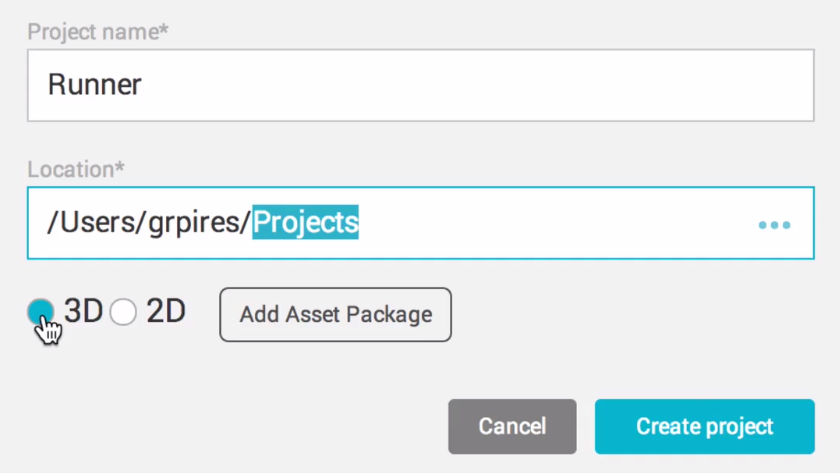
Open Unity, and press “New project” or “NEW” to create a new project.

The screen will change to let you set some properties of the project:
- Name the project “Runner”, as has been done in the following image.
- To set the project’s location, it is good practice to have a Projects folder to contain all your projects.
- Select “3D” as the rendering mode. Even in a 2D game, there can be 3D art used to make what will be shown in 2D.
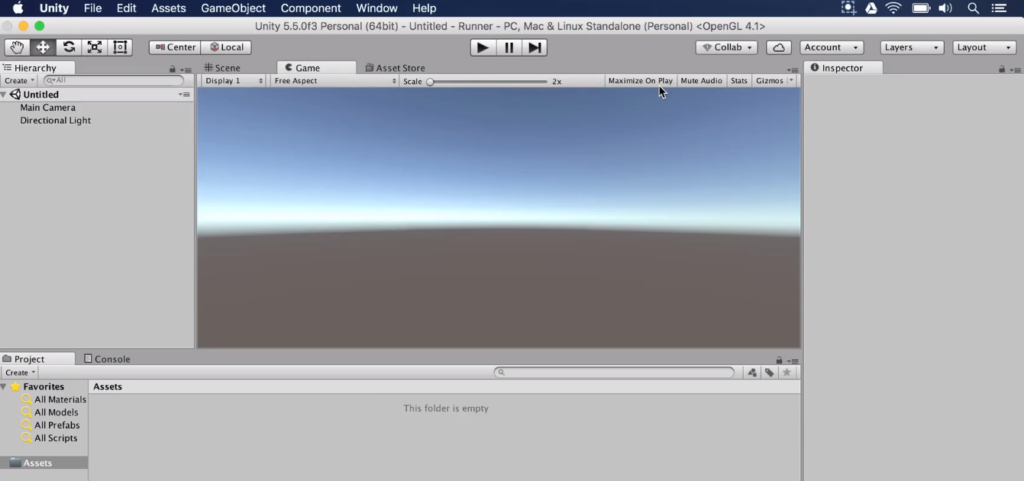
Press Create project, and let Unity prepare the files for the project. Then the Unity editor will open with a new default Unity project:
Part 2: What are the Windows of the Unity Editor?
Let’s go through the panels we can see in the Unity Editor.
The Hierarchy
The left sidebar contains the Hierarchy. The Hierarchy lists all the elements in the Scene. A Scene is like a moment or snapshot of your game, such as a main menu or a level. Currently, our Scene is called “Untitled,” as you can see in the Hierarchy.
A Scene contains different elements. In Unity, these elements are called game objects.
Game objects are the most basic elements that make up a game. Unity creates two game objects by default. These game objects are “Main Camera” and “Directional Light”, which you can also see in the Hierarchy under their parent, “Untitled.” We will dive into these objects shortly.
The Scene Window and Game Window
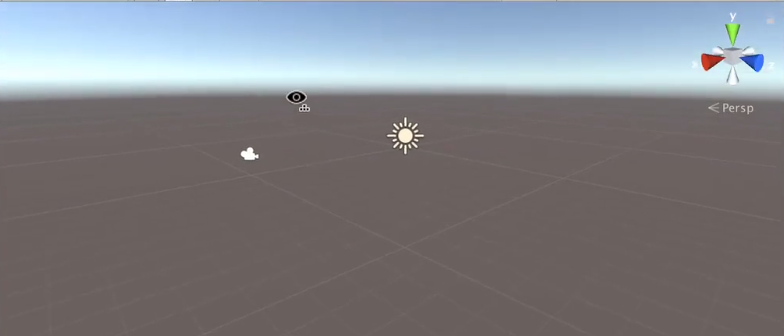
Click on Scene. This tab displays the game from the developer’s point of view. You will see the two default objects in the Scene, Main Camera and Directional Light. These objects are represented via icons of a camera and a sun.

If you click on one of the objects in the Scene, its name will become highlighted in the Hierarchy.
The Scene window also contains another object that is not in the Hierarchy. The Scene window contains the Scene camera, which you as the developer can use to navigate the game.
Right-click and hold the right mouse button in the Scene window. Your cursor will transform into an eye, which lets you know you are using the Scene camera.
Moving Around the Game
You can move the mouse to look around the game. You can use the hit and hold the W, A, S, and D keys on your keyboard to walk around the game. You can use Q and E to move up and down.
The Different Unity Cameras
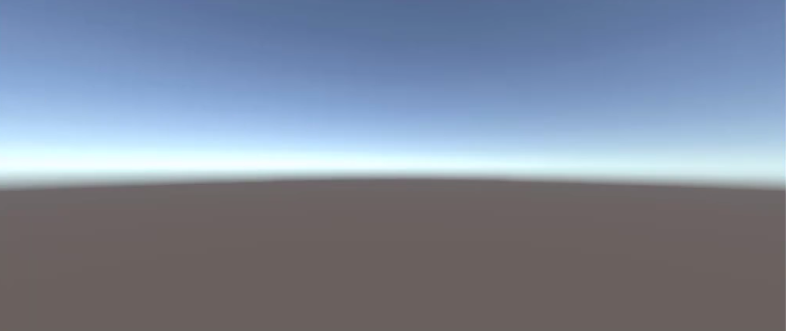
The Scene camera renders the game for the developer. The Main Camera renders the game for the player. Click on the Game tab to open the Game window. The Viewport will show the horizon of the skybox:
Disabling Main Camera
There is a way to disable the Main Camera. Select it in the Hierarchy. The in the Inspector (the sidebar on the right), uncheck the checkbox beside “Main Camera”. The Game window will turn black and display the text “Display 1 No cameras rendering:”

As you can see, it is important to have at least one Main Camera enabled in the game to render the game for the player.
Summary of Scene and Game
The Scene window shows what the developers see. The Game window shows what the player sees.
The Inspector Window
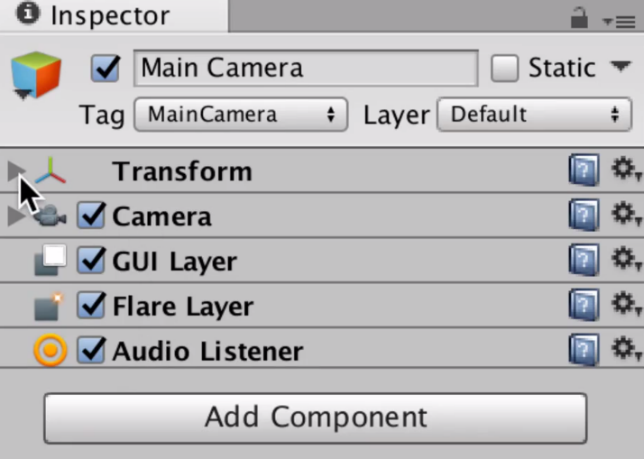
The Inspector window displays details about whatever you have selected, such as a file or a game object. Let’s look at exactly what the Inspector displays by choosing a game object to “inspect.”
Open the Scene window. Select Main Camera. The Inspector will contain a list of components of Main Camera. Components set a game object’s appearance and behavior.
The Main Camera
Main Camera has five default components: Transform, Camera, GUI Layer, Flare Layer, and Audio Listener. You can collapse a component by clicking on the triangles to the left of its name, as has been done in the following image.
The Transform Component
The Transform component contains 3 properties: Position, Rotation, and Scale. Each property has 3 values: X, Y, and Z. Our game will be 3-dimensional, so we need 3 depths of field.
Change the X Position of the Main Camera from 0 to 3. In the Viewport, the Main Camera will jump to the right.
As you can see in the next image, there are 3 arrows protruding from the Main Camera’s icon in the Viewport: a green arrow, a blue arrow, and a red arrow. The gizmo at the top right of the Viewport gives you a reminder of what each arrow corresponds to:
- The green arrow corresponds to the Y axis.
- The blue arrow corresponds to the Z axis.
- The red arrow corresponds to the X axis.
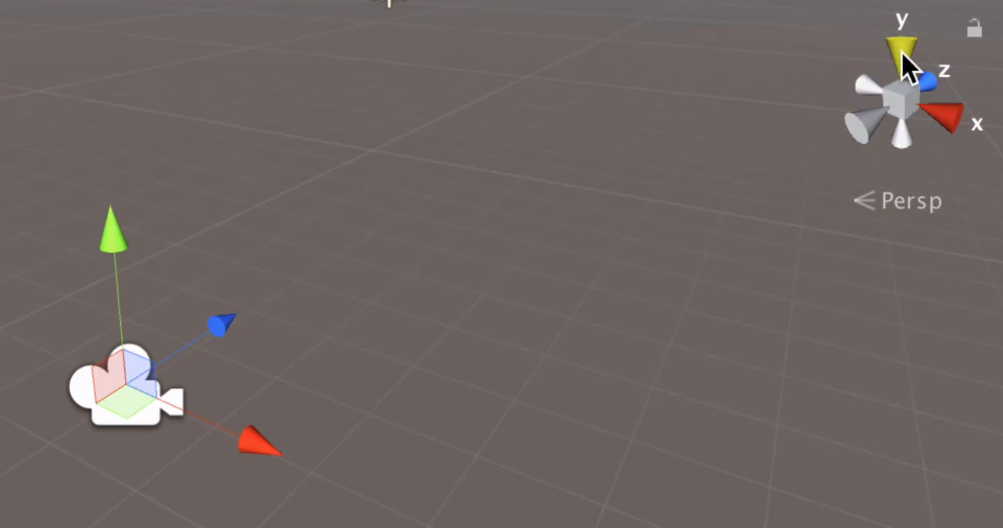
- X is the horizontal axis.
- Y is the vertical axis.
- Z is the depth axis.
You can click and drag each arrow to move the Main Camera in your desired direction. For now, set the position of the Main Camera to 0 -1 -10.
Moving and Rotating Objects
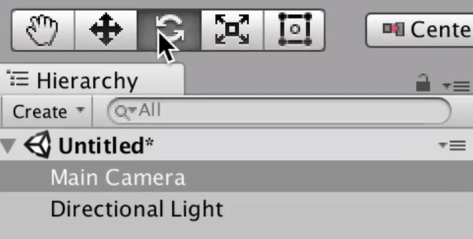
The X, Y and Z arrows appeared because we have the Moving tool selected, as you can see in the group of buttons above the Hierarchy.
Among these buttons, click on the icon to the right of the Moving tool, as has been done in the following image. This is the Rotating tool. In the Viewport, circles will appear around the Main Camera.
To see how the Rotating tool affects the Main Camera, expand the Camera component in the Inspector.
Lines will appear in the Viewport showing the camera’s field of vision. Also, a Camera Preview window will appear in the Viewport.
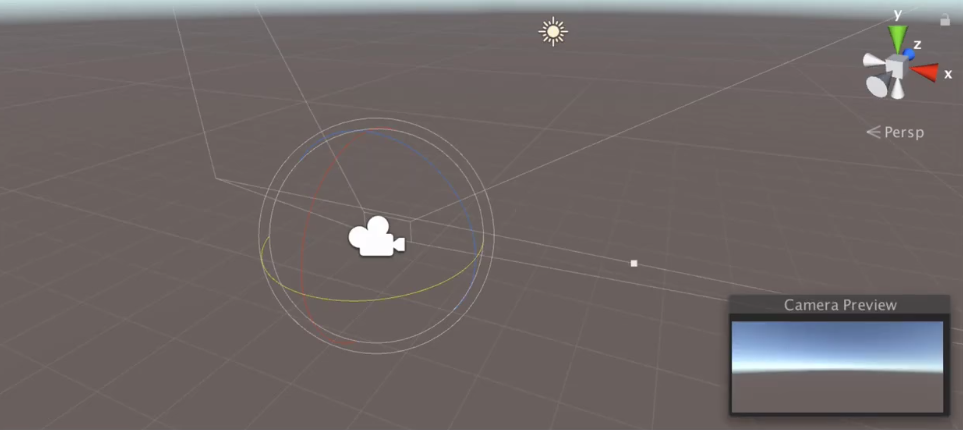
If you click and drag on a circle around the Main Camera, the camera’s field of view will move. Alternatively, you can change the camera’s Rotation values in the Inspector.
Scaling Object
The button to the right of the Rotating tool is the Scaling tool. The Scaling tool will not work for the Main Camera because it is not a tangible object. For other objects, this tool would change the Scale values, which would change the size of the object.
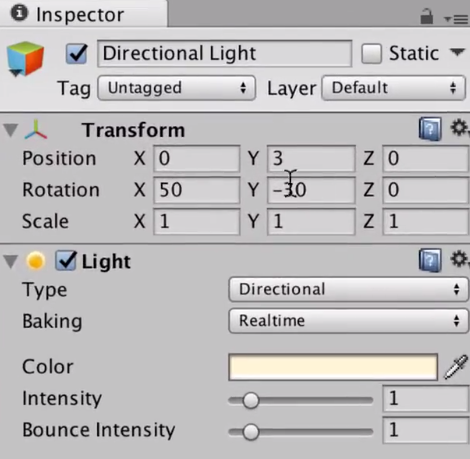
Changing a Game’s Lighting in Unity
Click on the Directional Light. The components in the Inspector will change. Here you can change properties of the light, including its type, color, and intensity.
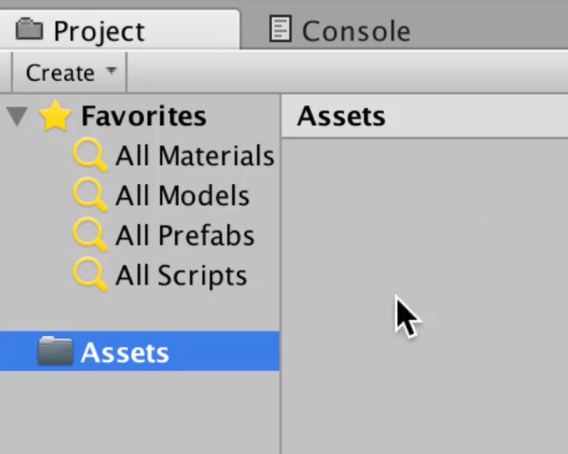
The Project Window
The bottom panel in the Unity editor is the Project window. This window contains a folder named “Assets”. Every file we use for the game will be stored in the Assets folder. For example, when we use an external 3D model or make a script, Material, or animation, the file will appear in the Assets folder.
Unity’s Console
The tab beside the Project window is the Console window. This window displays details about what is happening in the game’s code or the game itself. The Console window will display error messages, warnings (tips for optimization), and information messages.
Step 3: Changing a Game Scene
When you change something in the scene, “Untitled” will have an asterisk beside it in the Hierarchy. This means that there are modifications to the game that haven’t been saved yet.
Saving a Project in Unity
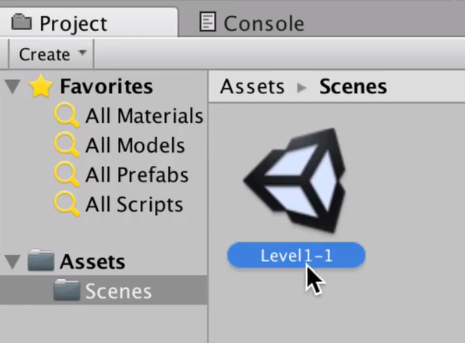
To save the game, go to File > Save Scene. Select the Assets folder. Press “New Folder”. Create a folder named “Scenes”. In the Scenes folder, save the file as “Level1-1”. Press Save.
Seeing Scenes in Unity
In the Project window, the Assets folder will contain a Scenes folder. Because we have one file open only, our Scenes folder has stored a default Unity file named “Level1-1.”
That does it for this tutorial! Now you have a solid grasp of the Unity editor and can navigate your project confidently. What tutorials do you want to see next? Drop a comment below.
Review
Part 1: Introduction to the Unity Editor
Part 2: What are the Windows of the Unity Editor?
Step 3: Changing a Game Scene
—Team Mammoth from Mammoth Interactive INC. Tutorial by Glauco Pires and Transcribing by Alexandra Kropova