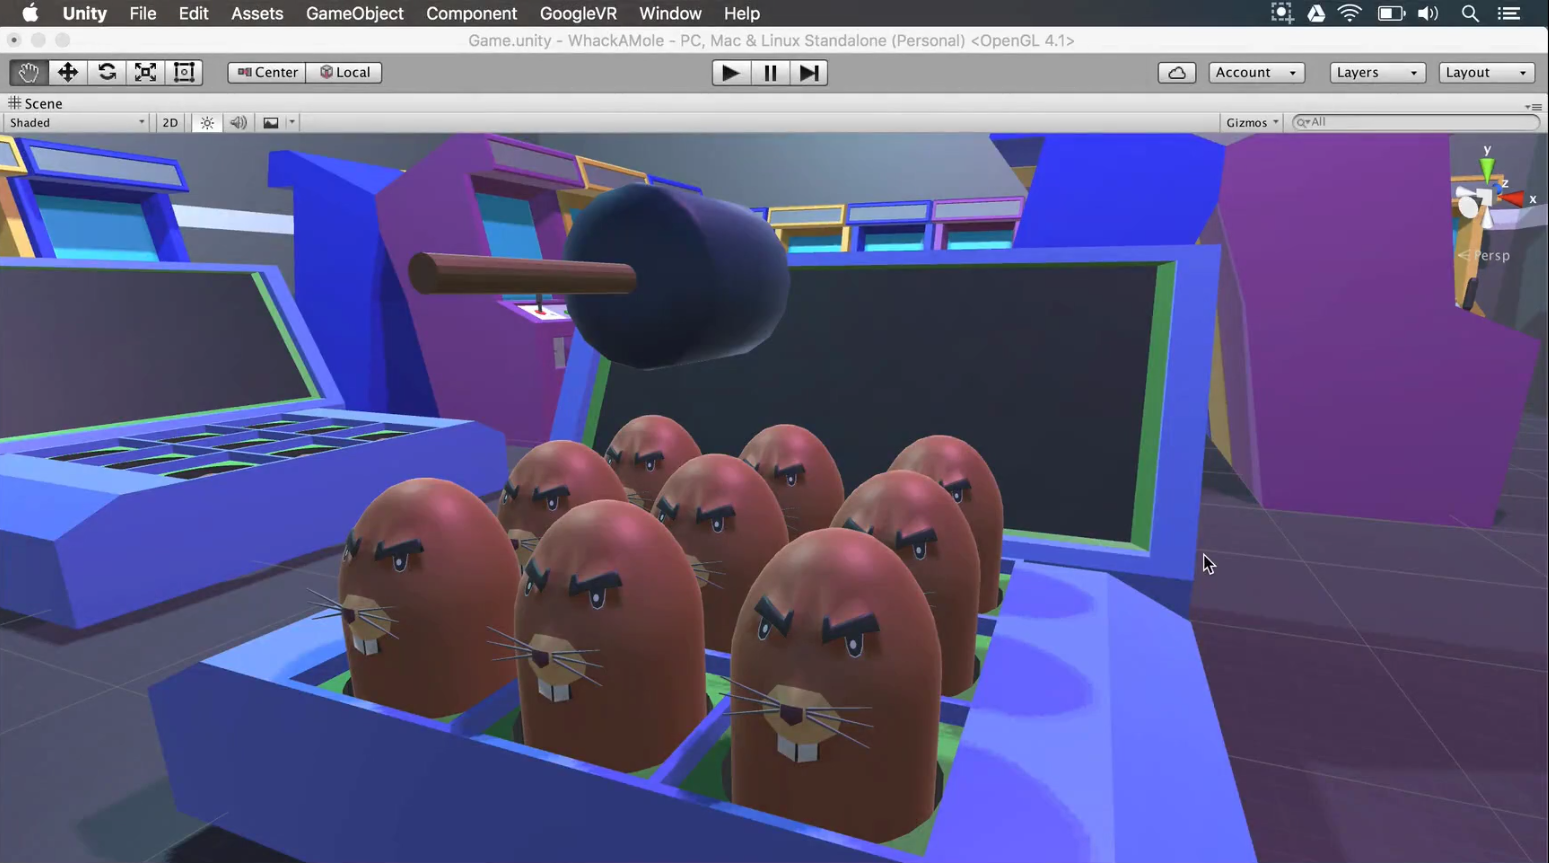
Do you want to learn how to build a virtual reality game? You’ve come to the right place. Let’s talk about how to set up your first virtual reality game in Unity and C#. We’ll be building the basic structure of a 3D VR Whackamole game for Unity’s Gear VR.
Tweet
We’re using Unity v5.4.3f1. If you’re using a different version of Unity and find an incompatibility, drop us a comment down below with your question.
In this tutorial:
- Why Unity? The Best Engine for VR Game Development
- Step 1: Installing Unity
- Step 2: Starting a New Project
- Step 3: Prototyping a Game with Primitives
- Step 4: Setting Up Objects to Hit
- Changing Object Size
- Conclusion
Why Unity? The Best Engine for VR Game Development
If you want to make a VR game, Unity is the program for you. The Unity engine comes with built-in models, materials, and more, which you can use to make your own 3D games.
Best of all, you can get a Personal license of Unity completely free right here. Yes, you can publish games to the App Store, Google Play and Steam with this version.
Step 1: Installing Unity
Press “Download Installer”, which will download the helper file “UnityDownloaderAssistant”. Double-click the file, and open the “Unity Download Assistant” file that appears.
Press the Open button from the pop-up that appears. Then press “Continue” from the installation instructions. Read the terms of service, and press “Continue and Agree” if you agree with them.
Then you will see options on which Unity components you wish to download. Ensure that the top three items are selected (Unity, Documentation, and Standard Assets). You can select additional components to install extra files.
Press “Continue”. Once the files are installed, you can open Unity!
Step 2: Starting a New Project
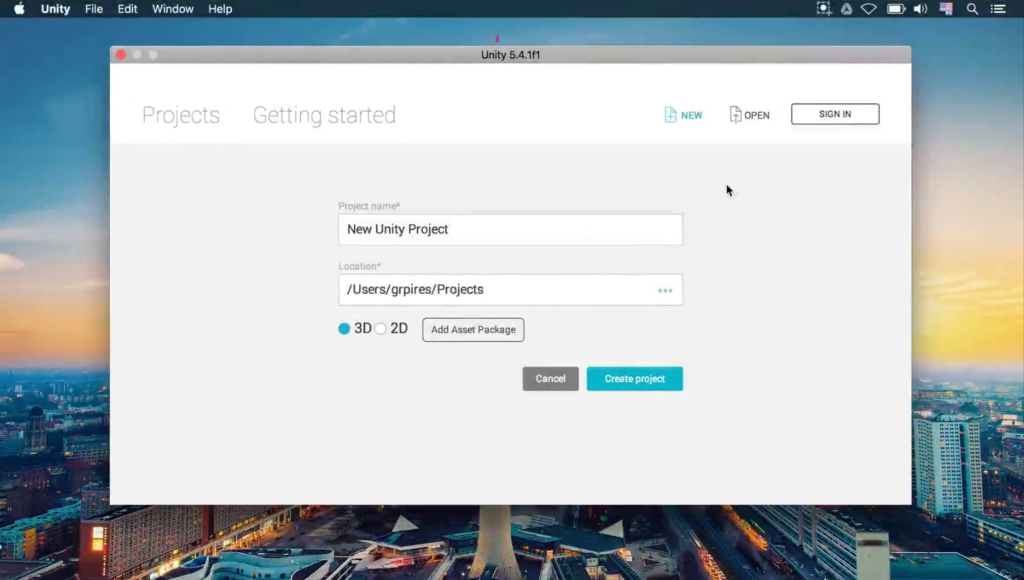
To make a new project in Unity, click on “NEW” in the top right of Unity’s start screen.
Create a new project in Unity named “WhackAMole”. Leave 3D enabled, as we will work with VR. You can leave Unity Analytics disabled.
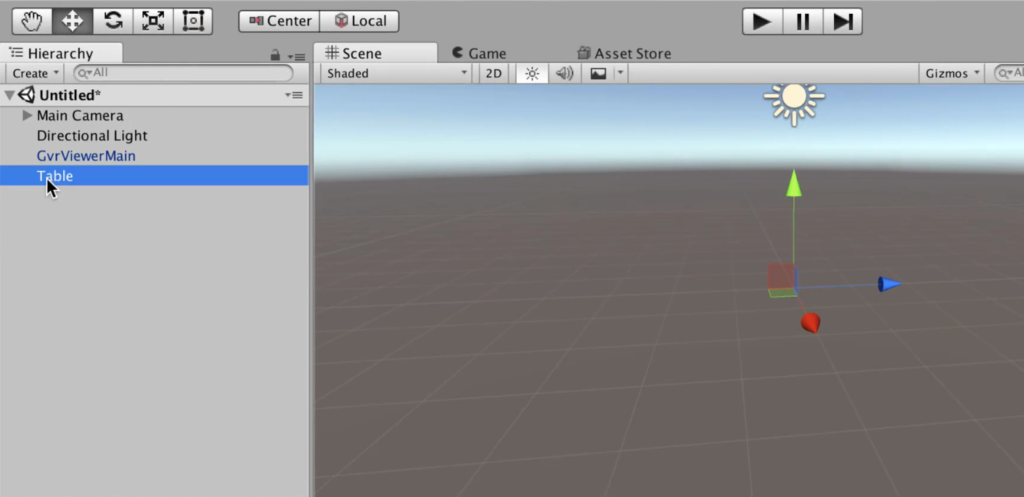
In the Assets folder, go to GoogleVR > Prefabs. Drag and drop GvrViewerMain.prefab to the Hierarchy to activate VR Mode.
To activate a crosshair, go to Assets > GoogleVR > Prefabs > UI for the game. Drag and drop GvrReticle.prefab to the Main Camera in the Hierarchy.
Let’s jump into building our project right away! If you have any questions on the Unity editor, drop them below.
Step 3: Prototyping a Game with Primitives
Let’s design the layout of our game in Unity with primitives.
Create an empty game object in the Hierarchy. Name the object “Table”. Give Table the position 0 0 0.
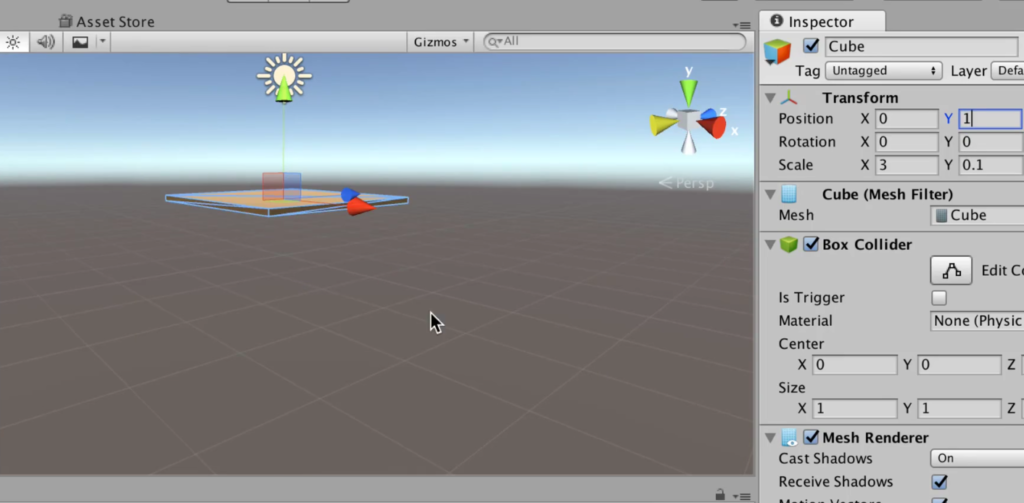
In the Table object, create a cube. This cube will represent a table. Create a material in Assets named “TableMaterial”. Give TableMaterial a light brown color with RGB values such as 109 67 22. Drag and drop TableMaterial onto Cube.
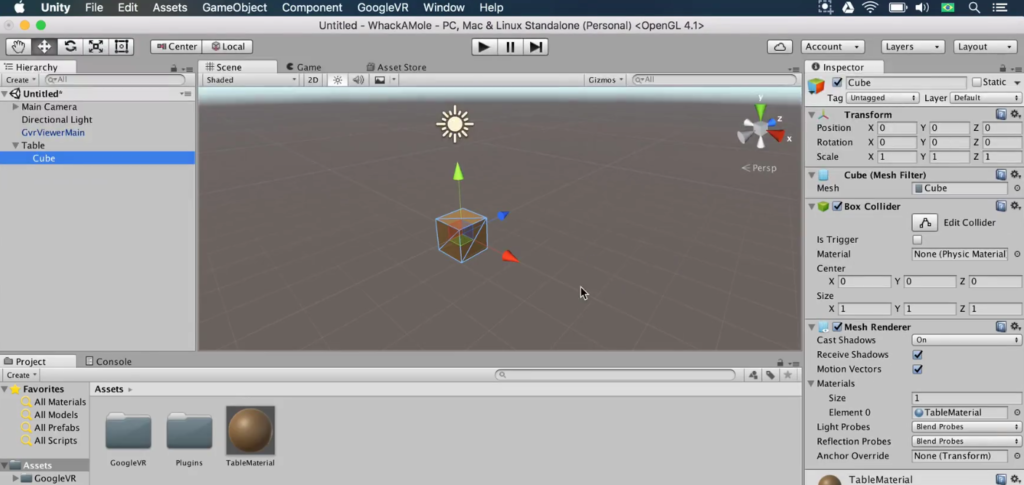
Next, we will make Cube look like a table. To do so, give Cube the Scale values 3 0.1 3. Change its Y position to 1.
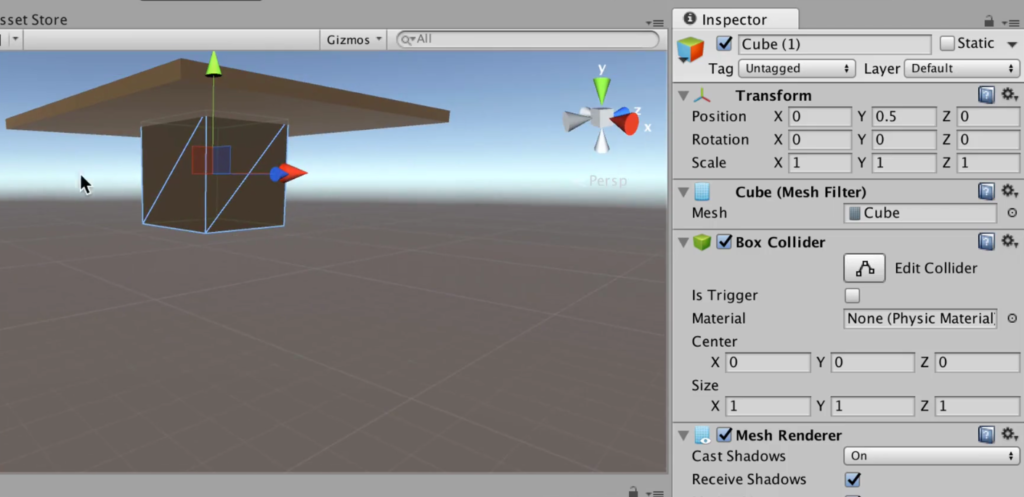
Let’s give the table a stand to, well, stand on. To make such a platform, duplicate Cube. Change its Y position to 0.5. Give it the Scale values 1 1 1.
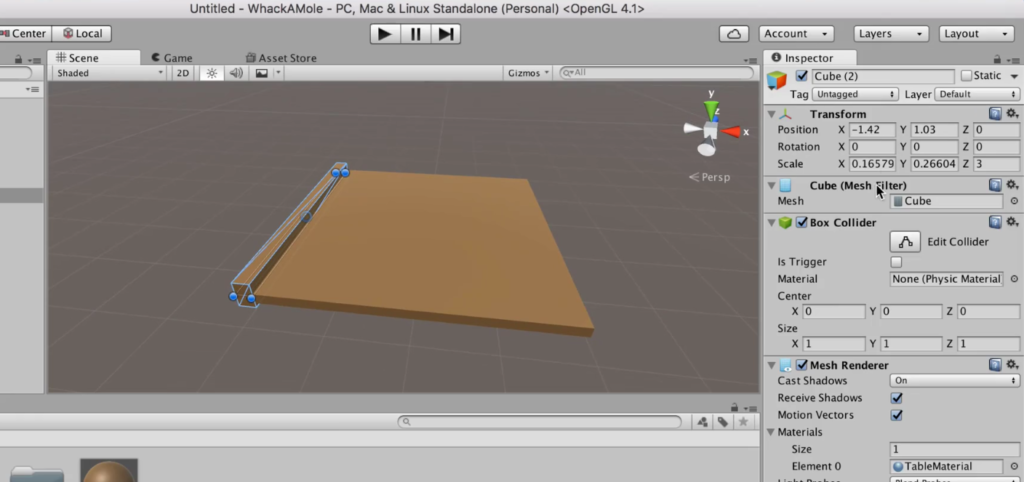
For our virtual reality Whackamole game, we’ll have moles poking their heads out from the table, for the player to whack. To let this happen, we’re going to separate the table into sections, one for each mole.
Duplicate Cube again. Use Unity’s resizing tool to set the position of Cube (2) to about -1.42 1.03 0 and its scale to 0.17 0.27 3.
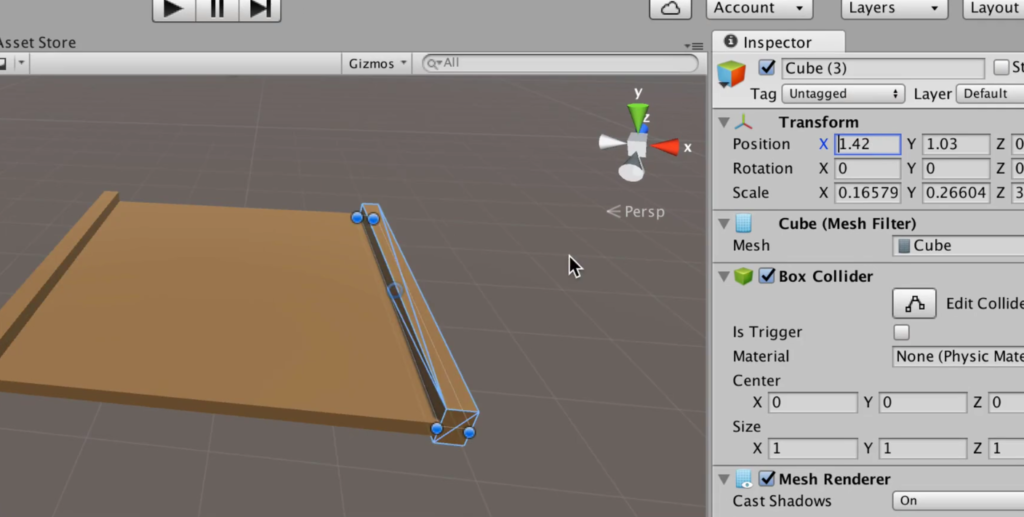
We need to do the same for the other side of the table. Duplicate Cube (2). Give Cube (3) the X position 1.42.
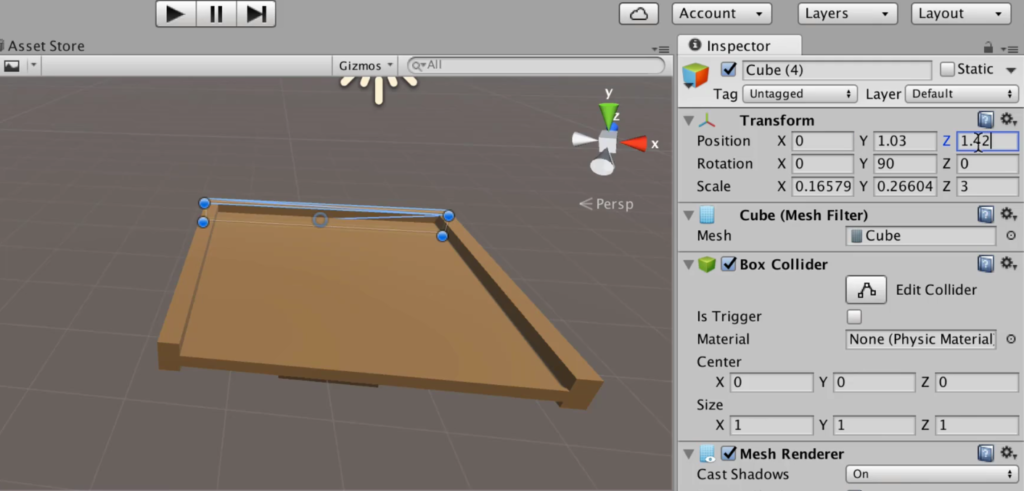
Actually, we’re going to need to make a table border for the other two sides as well. So, duplicate Cube (3). Set the Y rotation of Cube (4) to 90. Give Cube (4) the position 0 1.03 1.42.
Finally, for the last side. Why can’t tables have 3 side? Duplicate Cube (4). Give Cube (5) the Z position -1.42.
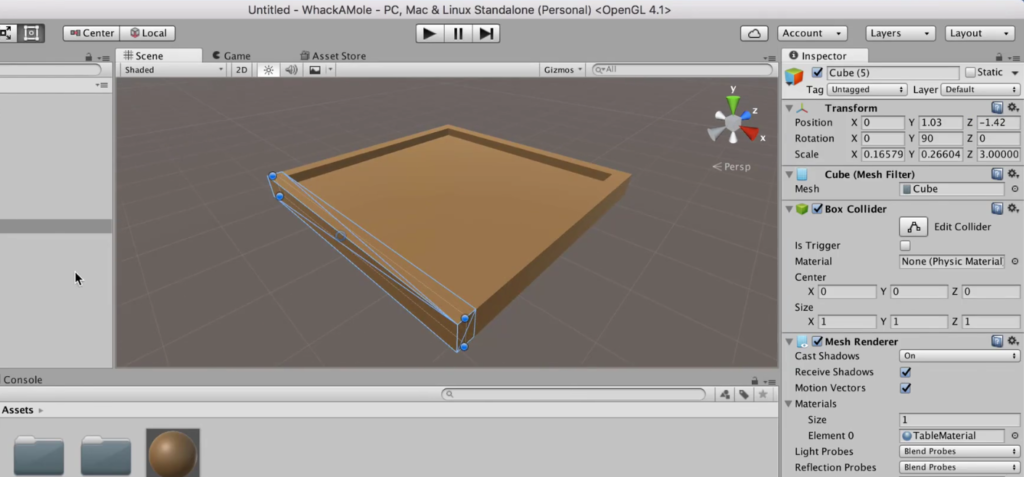
To improve game aesthetics (and as a result, user experience,) we will change the colors of the table borders. Create a new material named “Table2Material” in Assets. Give Table2Material a dark brown color, such as 53 37 10.
Select Cubes 2, 3, 4, and 5. In the Mesh Renderer component, expand the Materials property. Drag and drop Table2Material to the “Element 0” field. The color of the four game objects will change.
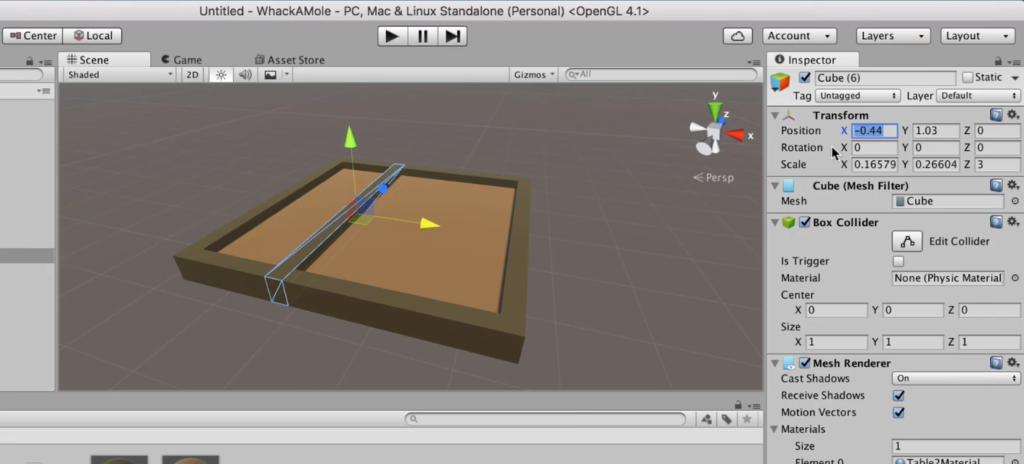
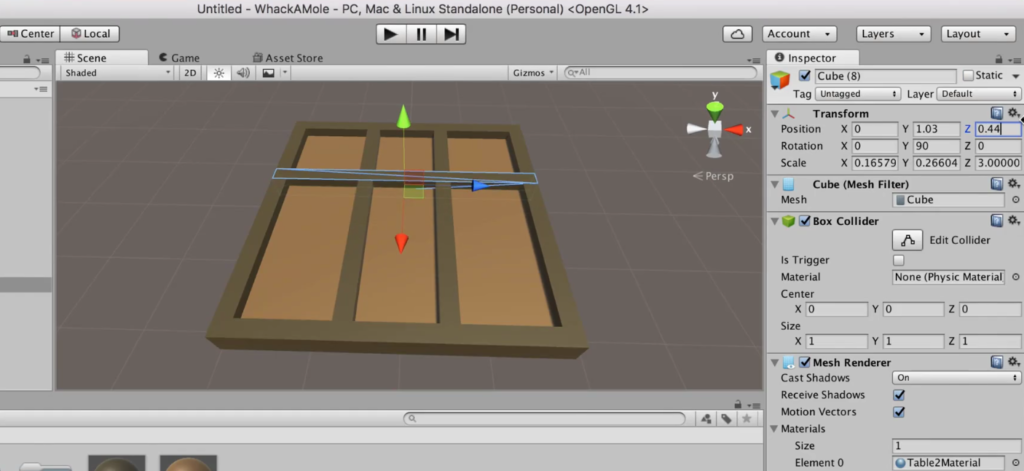
Now we can divide the table into nine sections. Duplicate Cube (2). Move Cube (6) to an X position of -0.44.
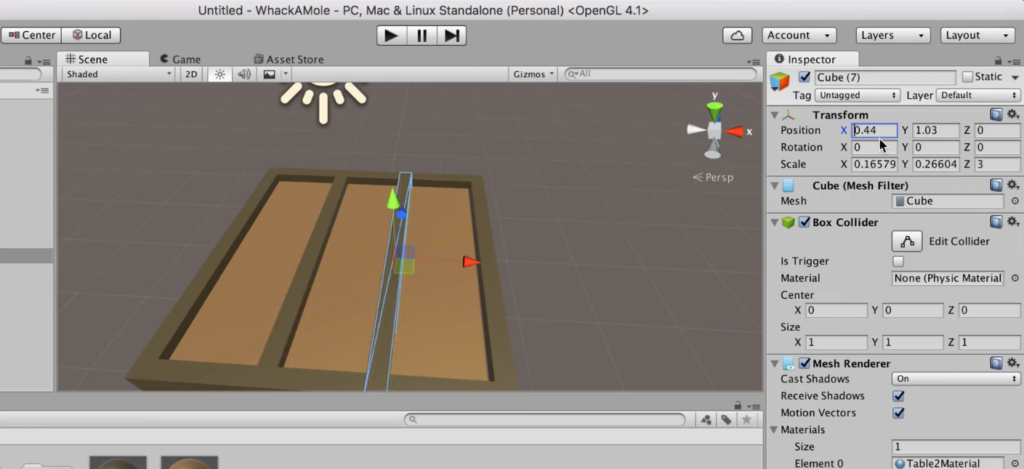
Duplicate Cube (6). Move Cube (7) to an X position of 0.44.
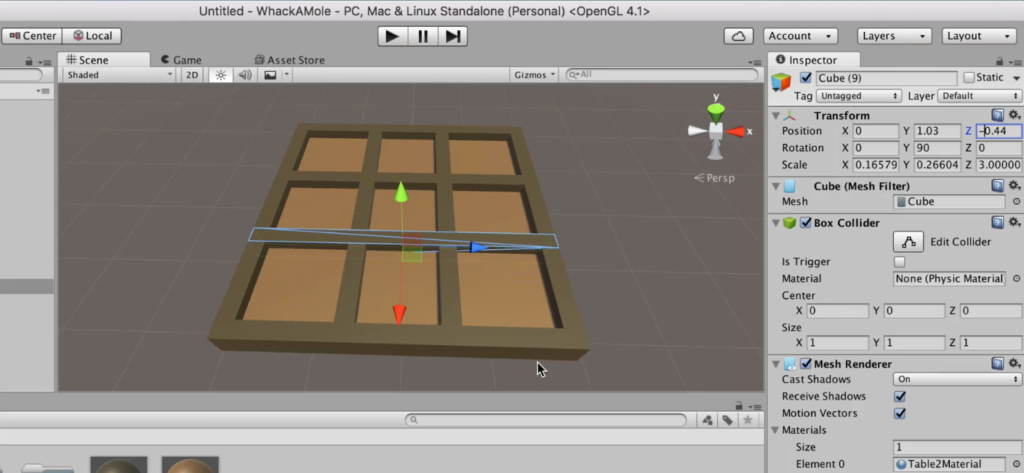
We’ll need 9 holes, so let’s keep dividing this table! Duplicate Cube (5). Move Cube (8) to a Z position of 0.44.
And, for the final section! Duplicate Cube (8). Move Cube (9) to a Z position of -0.44.
Step 4: Setting up Objects to Hit in Unity
In this game, the player’s target will be a bunch of moles! No, not a facial mole. This kind of mole:

Now that we have a table to hold our moles, let’s get started on the moles themselves.
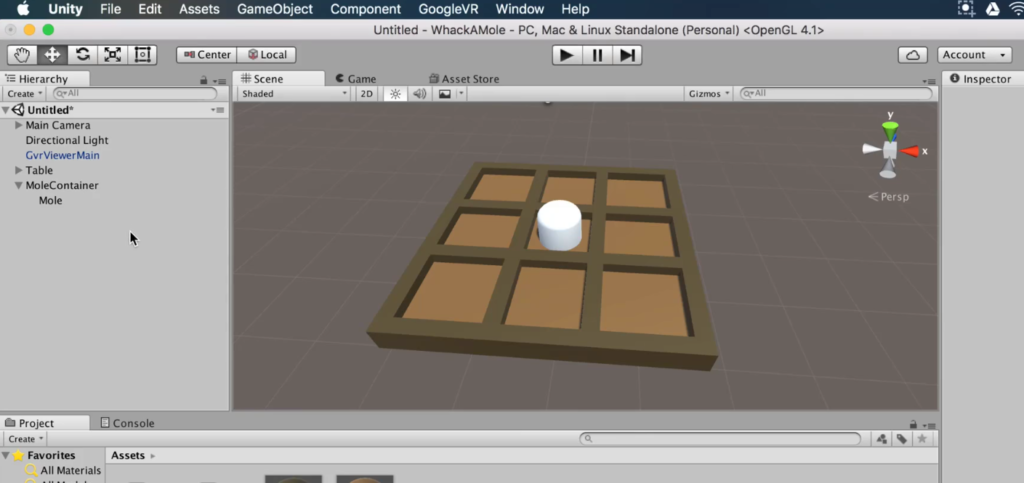
First we will create a game object to contain all the moles. Create an empty game object in the Hierarchy. Give GameObject the position 0 1 0. Rename GameObject “MoleContainer”.
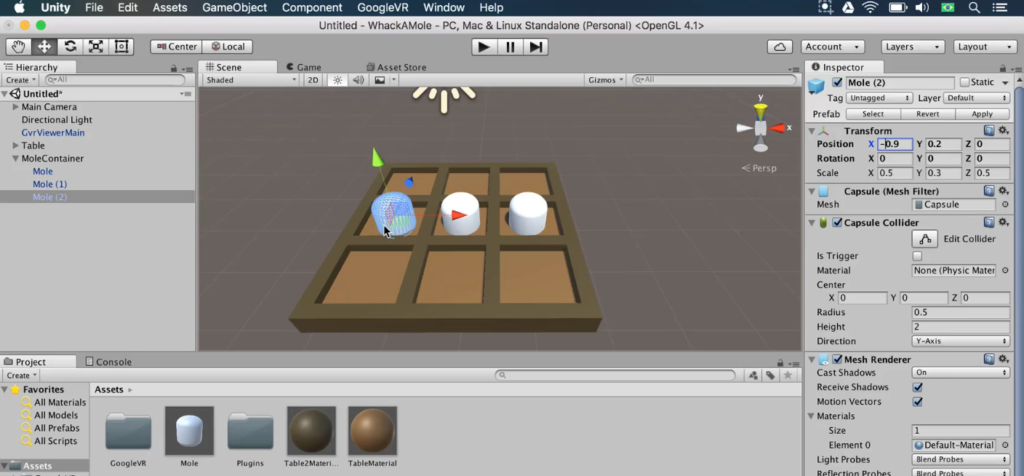
Right-click in MoleContainer in the Hierarchy, and create a capsule. Change Capsule’s scale values to 0.5 0.3 0.5. Rename Capsule “Mole”. Move Mole to a Y position of 0.2.
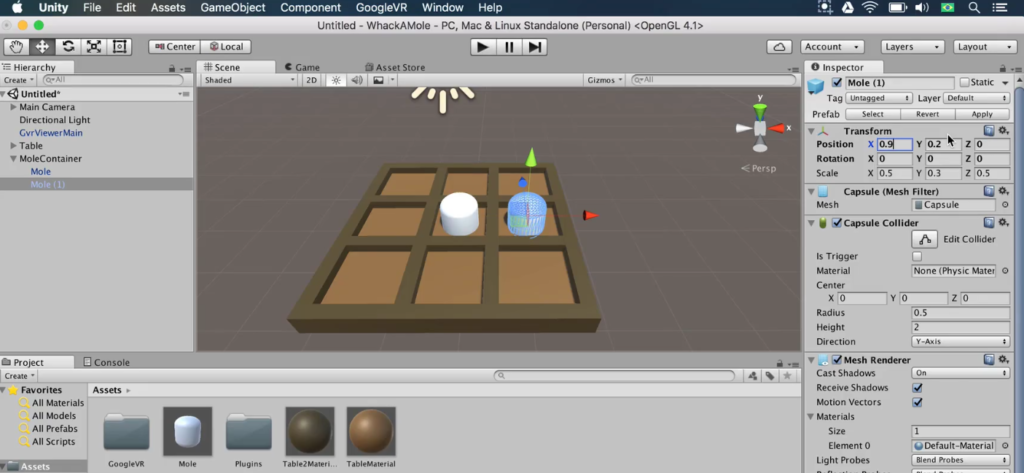
There will be nine moles on the table that will pop up at random times. We could duplicate Mole, but instead we can transform Mole into a prefab so that we can easily reuse it later.
Drag and drop Mole from the Hierarchy to Assets. Duplicate Mole in the Hierarchy. Move Mole (1) to an X position of 0.9.
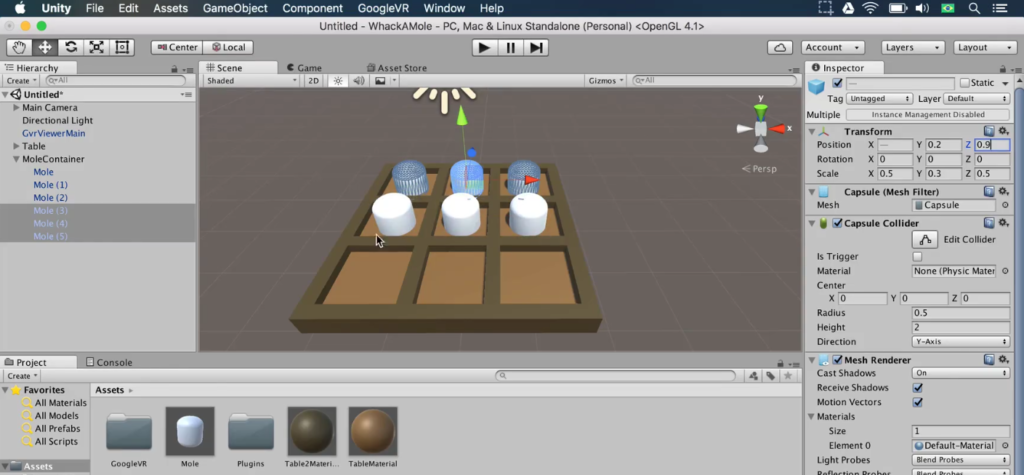
To make the third target, duplicate Mole (1). Move Mole (2) to an X position of -0.9.
To quickly make more targets, we don’t need to duplicate a cylinder one at a time anymore. Instead, select all the three cylinders. Duplicate them, and set the Z positions of the three new Moles to 0.9.
To finish creating the remaining moles, duplicate the three selected moles. Set the final three moles’ Z positions to -0.9.
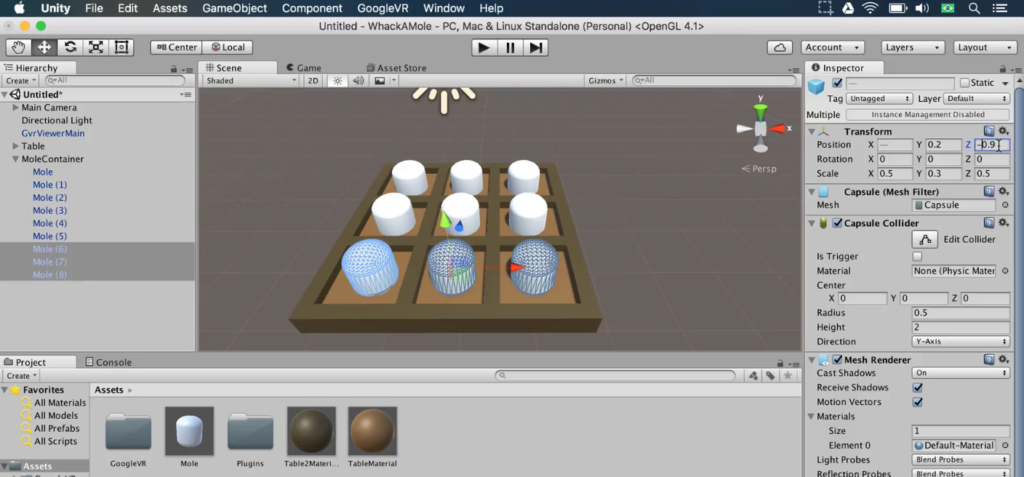
The plan for this game is that the moles we have created will move down and one by one will pop up from the table. A player will whack them when they are up.
Changing Object Size
One thing that will be helpful to know is how to change the size of objects. To test how to change the size of the moles, change the scale of Mole to 0.6 0.6 0.6. To apply the changes to the other moles, press the Apply button in the Inspector.
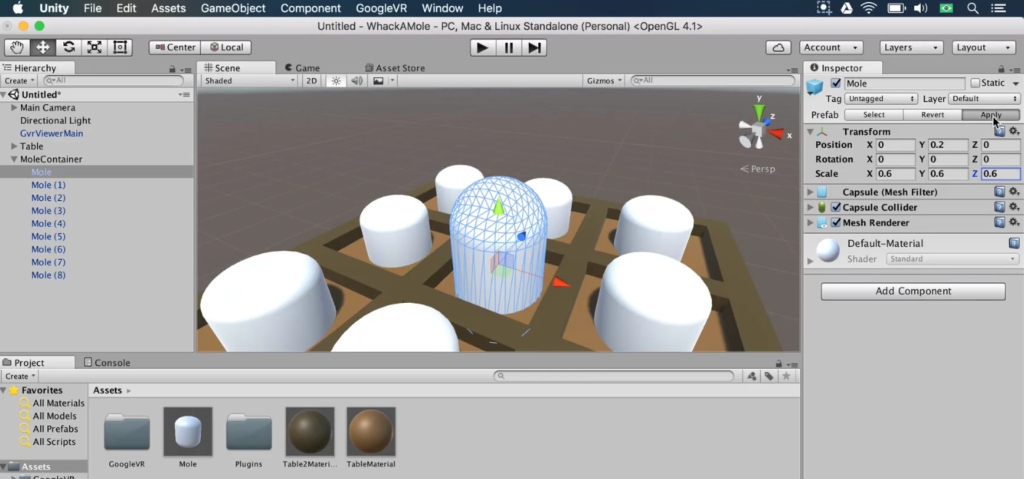
That was just a test, so revert the moles back to a scale of 0.3 0.3 0.3.
Some final fine-tuning steps: Rename Main Camera “Player”. Change Player’s position to 0 2 -2 so that the player is closer to the table.
And lastly, save the scene. It’s useful to save often, as you never know when your program may crash, especially if your game is load heavy.
Conclusion
That does it for this article! Let’s summarize what we’ve done so far:
- Downloaded and installed Unity
- Started our first project
- Make our first two art assets
- Learned how to change colors, position and sizing
- Remembered to save so that we don’t lose all our work
We’ll continue this game in the next tutorial! Unless you oppose…. What tutorials do you want to see next? Drop a comment below.
Review
- Why Unity? The Best Engine for VR Game Development
- Step 1: Installing Unity
- Step 2: Starting a New Project
- Step 3: Prototyping a Game with Primitives
- Step 4: Setting Up Objects to Hit
- Changing Object Size
- Conclusion
—Team Mammoth from Mammoth Interactive INC. Tutorial by Glauco Pires and Transcribing by Alexandra Kropova